When you first boot up Arma, you will already find a profile ready for you. Most people do not bother changing this profile until they start playing on multiplayer servers and realize that their in-game name is actually their Windows user name. Obviously that is not great, you clearly want to use your online nickname. The problem? You cannot rename the default profile. To make matters worse, all your custom settings, controls and configuration is attached to the profile, creating a new profile means you start from scratch.
For some people, this can mean hours of work and unsatisfying gameplay.
Thankfully, there is a way to create a new profile and still keep all your settings from your old one. You’re gonna have to move and rename some files, but bear with me, I’m going to explain it all in great detail.
1. Create a New Profile
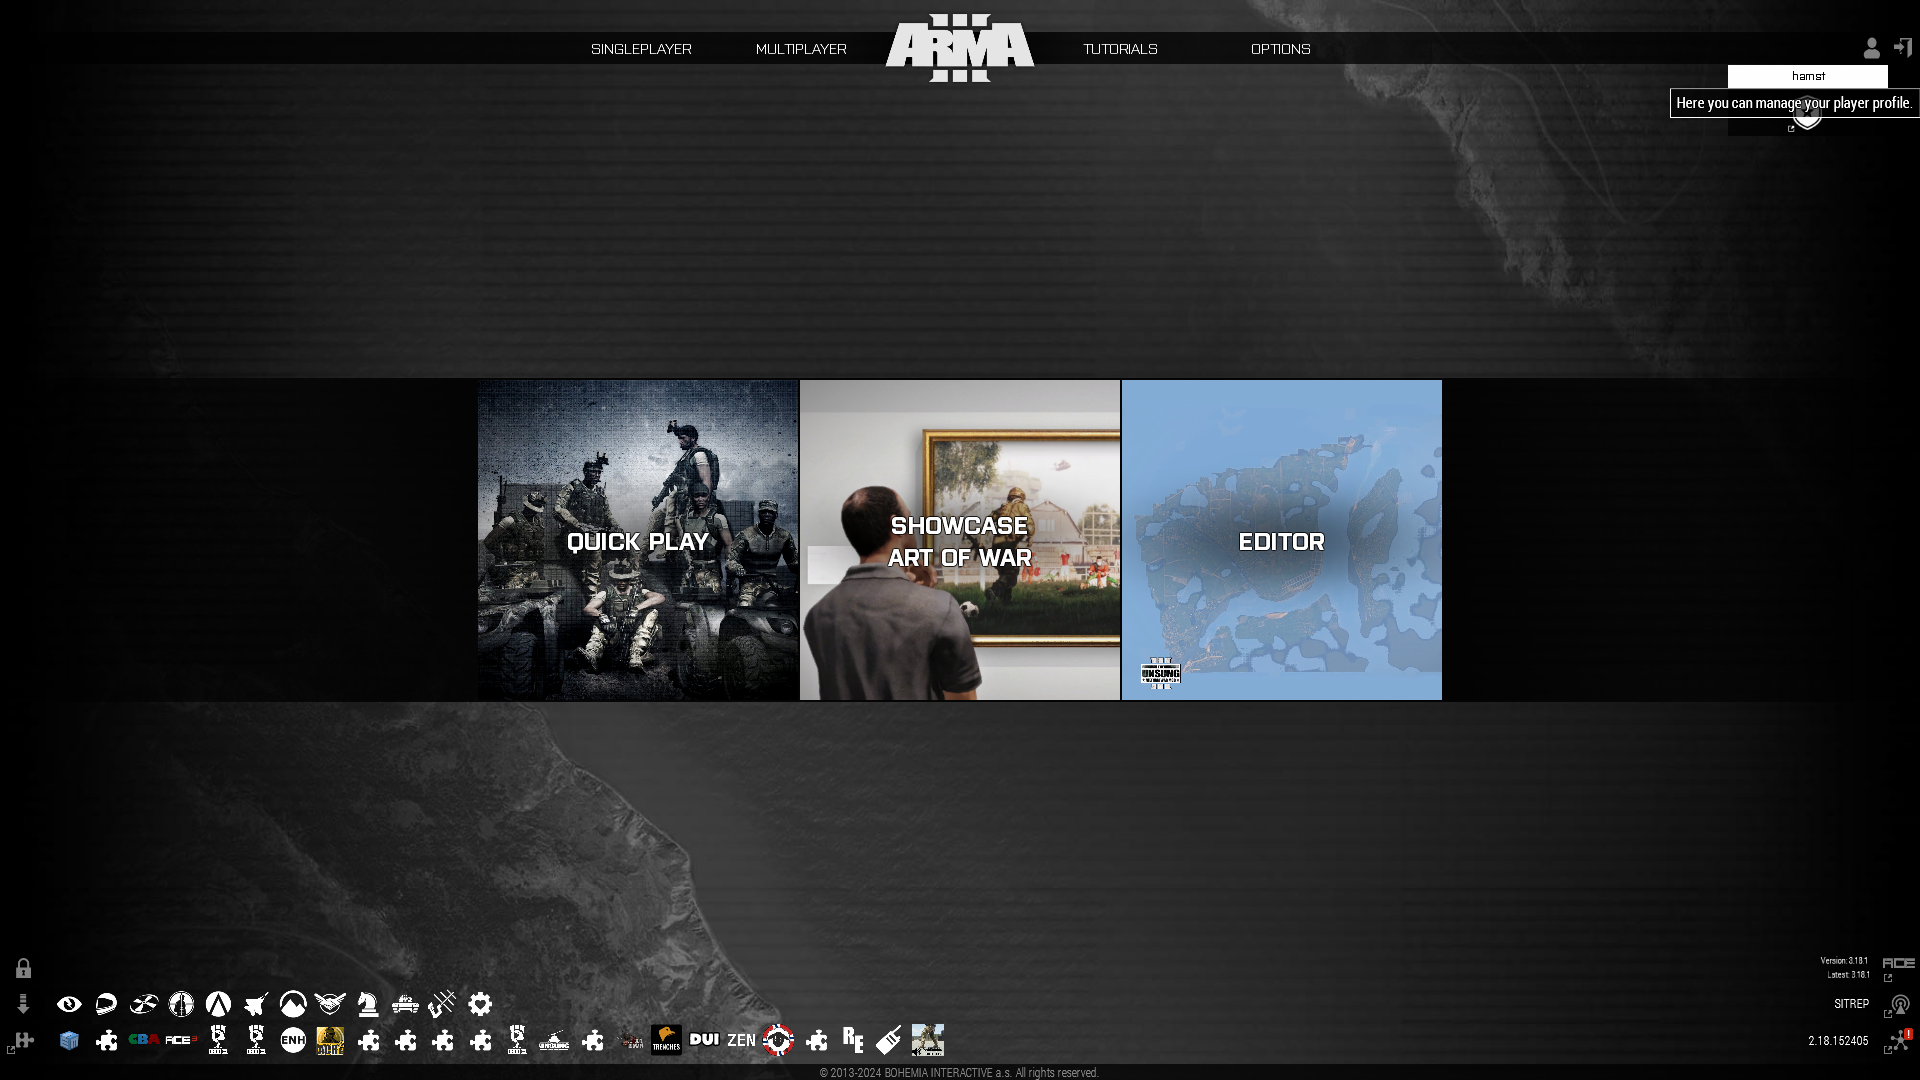
This would probably be the easiest step in the list if Bohemia did not hide the profile settings so well in their main menu. Launch Arma the usual way, then click the little person icon in the top right corner. You should see your current profile name there (for me it is hamst). Click it. Now in the new menu you can create a new profile by pressing “NEW”. Do not worry about configuring anything in this new profile, just leave it as is and give it the name you want others to see in multiplayer.
Hint: If you’re playing with our Arma unit, the Newfound Pioneer Corps, you are required to have your in-game name relate to your Discord name.
2. Find Your Old Profile Configuration on Your PC
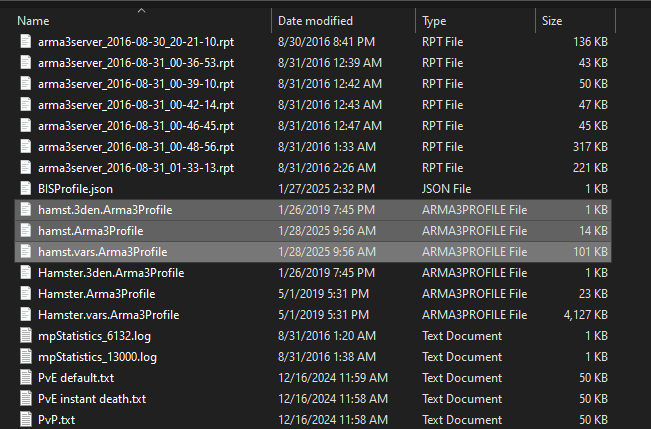
On your local machine, navigate to this location:
%UserProfile%\Documents\Arma 3
For me the link resolves to C:\Users\hamst\Documents\Arma 3. You can easily resolve the link by copying it, pressing [Win] + [R], and then pasting it in there and pressing okay. A folder should open. This folder contains your old profile data.
3. Copy the Right Files
Now, copy all files that start with your old Arma name, which is your windows profile name. In my case that would be hamst again. Mark them and press [ctrl] + [c] to copy. There should be either two or three files, depending on whether you have used the 3den editor already.
4. Paste the Files into Your New Profile Location
Now, navigate to your new profile location.
%UserProfile%\Documents\Arma 3 – Other Profiles\<Your new Profile name>
<Your new profile name> is whatever you put in as your name in Arma 3. There should only be a single folder in Arma 3 – Other Profiles, so it should be pretty easy to find. Just navigate up from the previous folder and down into Arma 3 – Other Profiles. Paste all the copied files into that new folder. They should be next to other files with the same file endings. Those are your new profile’s configuration files and they should only contain default values.
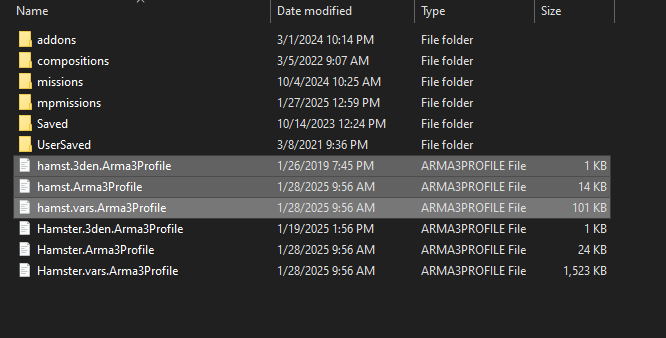
5. Delete and Rename
Now, simply delete all files containing your new profile name. Like I said, those only contain default values anyways, we do not need them. Once that is done, rename the files with your old username to match your new user name, they need to be named exactly like the files you just got rid of. Congratulations, you have copied your settings over from your old profile to your new one!
Finally
Boot up Arma and see if your settings are all working. Play with your new profile for a bit and see if you notice any differences. You should not, but in case you did any of the above steps wrong you can easily restart this whole process.
Looking for a group to make use of your new Arma 3 profile with? Why not join the Newfound Pioneer Corps? We play every weekend at times suitable for both America and Europe and have virtually no barrier of entry! I am looking forward to seeing you on the battlefield!