Checklist
Mods
Build your mod list to suit your mission, don't go overboard for the sake of going overboard.
Debug Console
Make sure Debug Console is available for host or logged-in admin.
Check Settings
Remember to configure your general and multiplayer settings
Game Master Module
Add at least a game master module for the logged-in admin.
Three Headless Clients
Add three headless client modules in your mission to help with performance
Export Mission
Last, but not least, export your mission and send it to one of the moderators to have it uploaded to the server
Mods
Below you will find a list of mods we suggest you always use and if you decide not to use any one of them, you should have a good reason for it. cTab can be excused based on the era a mission is being made for.
| Mod Name | Mod Function | Mod Steam Link |
|---|---|---|
ACRE2 | Adds radios and local voice chat | |
ACE3 | New interaction system, medical framework, weapon ballistics, magazine repacking, and an insane amount of other QoL features. | |
CBA A3 | Common functions library required by many other mods, including ACE3 and ACRE2 | |
cTab NSWDG Edition | Helmetcams, tablets and phones for extended command capabilities | |
Enhanced Movement | Climbing and Jumping | |
Enhanced Movement Rework | Makes Enhanced Movement better | |
Fifty Shades of Female | Adds female characters | |
The table below contains mods we recommend you use, as they make editing and running missions smoother and easier for everyone involved.
| Mod Name | Mod Function | Mod Steam Link |
|---|---|---|
3den Enhanced | Adds many features and QoL improvements to the 3D editor | |
Zeus Enhanced | Adds loads of useful modules and QoL features to the Zeus interface. | |
Other than the mods listed above you are free to use any mods that doesn’t violate our content policy.
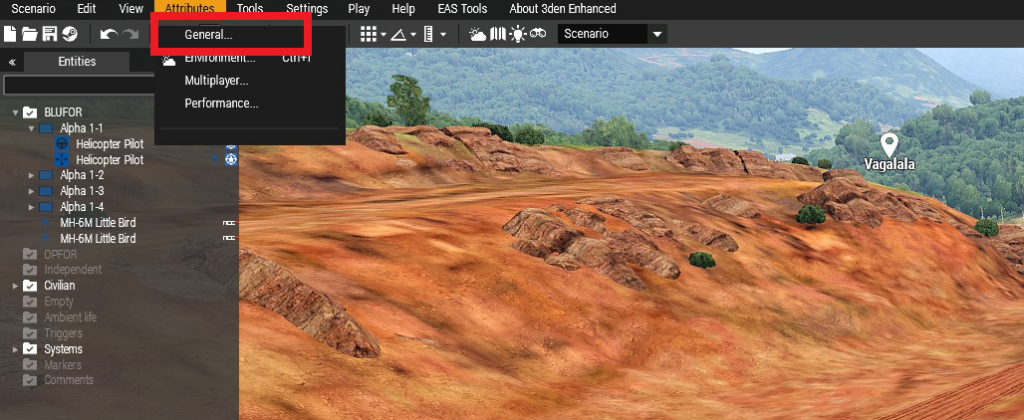
General Settings
We ask that you always enable the Debug Console for host or logged-in administrator, other than that you are free to change the settings to suit your mission.

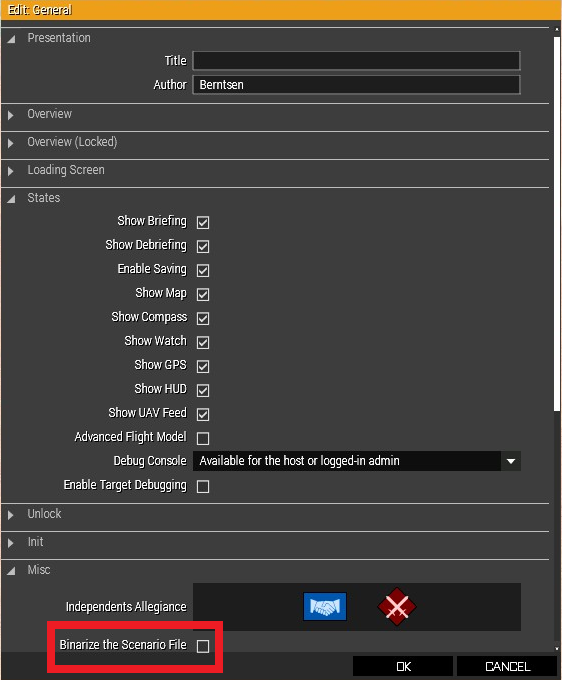
While you’re in the same menu, we recommend unchecking the box for “Binarize the Scenario File” as it can make it easier to edit missions at a later date.
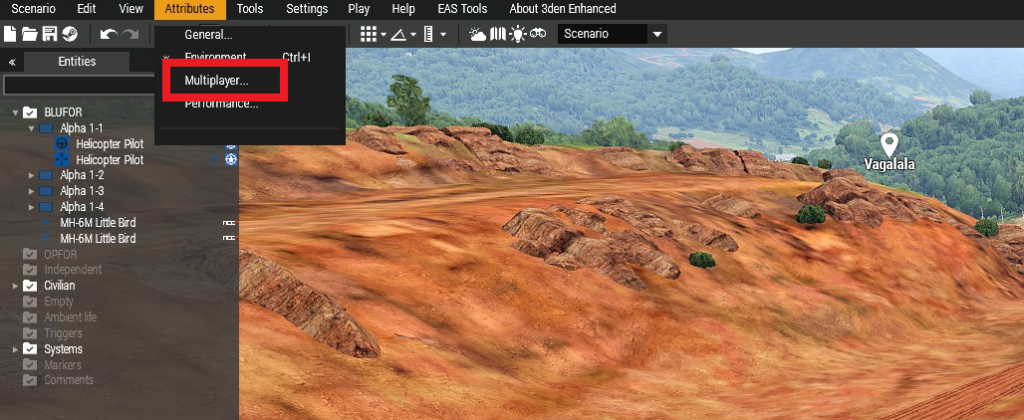
Respawn Settings
Always check out the respawn settings for your mission, you never know what might happen during a mission that will require some form of respawning.
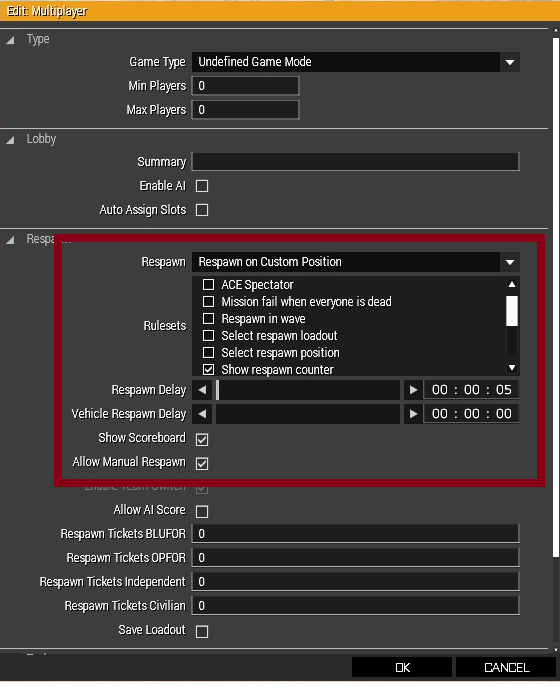
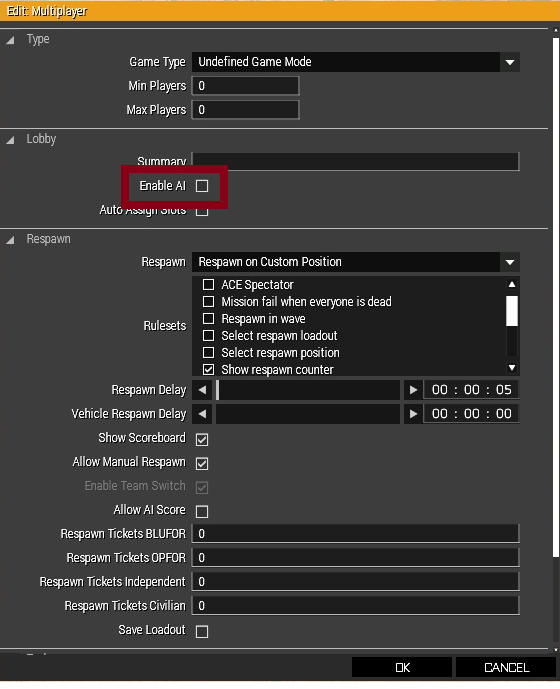
Ideally you’ll be using the “Respawn on Custom Position” and have placed a respawn module somewhere on the map, as it will help with people Joining In Progress (JIP) or for other game-related or technical issues that may arise during a session.
While you’re there we suggest you uncheck the box for “Enable AI”, it will disable AI slotting into unused player slots and make all our lives easier while playing an event!
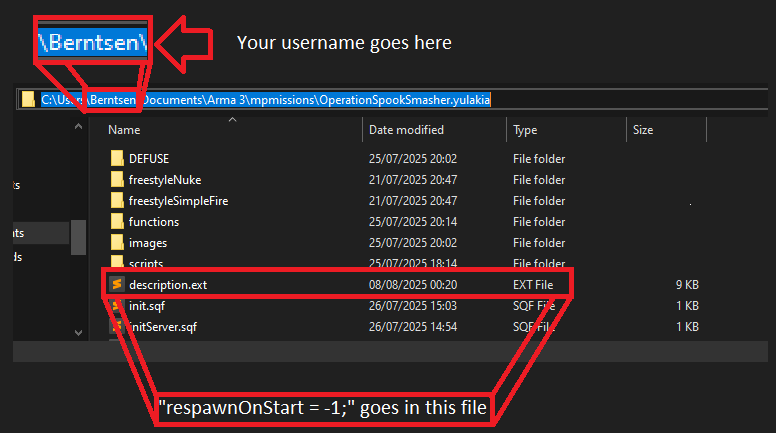
In order for respawn to work, you also need to place down respawn modules. If you want your players to spawn where you placed their units in the editor, you will also have to create a description.ext inside your mission folder, and make sure it contains the following line: respawnOnStart = -1;
Zeus - Game Master
You should always add at least one Zeus module to your mission, and it should preferably look like the image below. We strongly suggest you always set the “Default addons” to “All addons (including unofficial ones)” as that will let the Administrators/Zeus use the Zeus interface to its fullest.

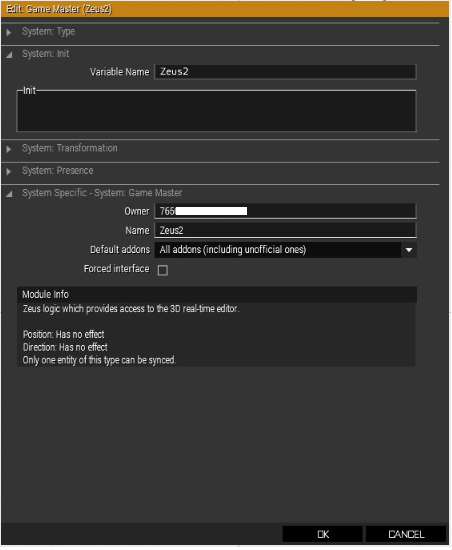
Should you want to add another Zeus to the mission you can set the Owner to a Steam ID if you don’t want it to be locked to a specific player slot. You can find your Steam ID over at https://www.steamidfinder.com/, you can then add that number to another Game Master module.
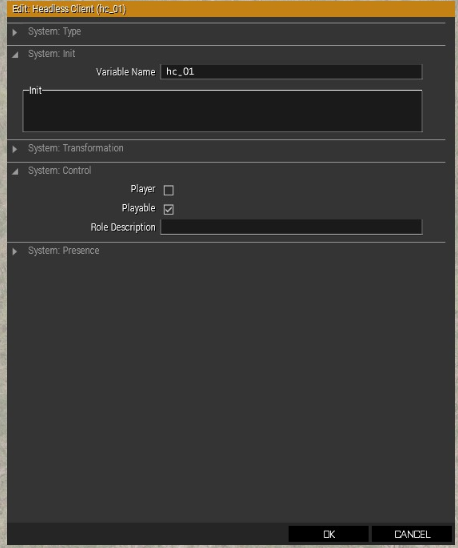
Headless Clients
Using Headless Clients (HCs) helps with performance in almost any given Arma 3 mission that includes a larger number of AI units in it. To allow HCs to work, you will have to add in a couple Headless Client modules to your mission, they will need to be set to “Playable” and have a variable name like “hc_01”, “hc_02”, “hc_03”, etc. We usually only run three HCs on our server so adding three HC modules to your mission should be enough.
Exporting your mission

At some point you’re going to be finished editing your mission and you’ll need to export it properly so it can be uploaded to the dedicated server, to do so simply click on “Scenario” in the top left of your screen, then hover over “Export”, and click “Export to Multiplayer”. This will export the mission to your “MPMissions” folder, which is located inside your game folder. The default path to this folder is “C:\Program Files (x86)\Steam\steamapps\common\ArmA 3\MPMissions”, but this may vary depending on where you have installed the game.
Looking for an Arma 3 Unit to Share Your Own Mission Creations With?
Check out our Arma 3 Unit, the Newfound Pioneer Corps! We are a group where all skill levels are welcome, attendance is and always will be voluntary, all slots and roles are open to everybody and everybody can host their own missions, no matter which setting or mod list they choose.